In our previous article on building apps with Apple’s Swift, we demonstrated how to use view controllers and views in code to craft a simple app. Before we begin with this next lesson, using storyboards to build an app in Swift, it’s worth revisiting that first piece. (The code that accompanies the piece is stored on SourceForge as “First Example.zip.”) Remember that view controllers in Swift manage two roles: they controls views on a page or part of a page, as well as navigation between pages. Creating a multi-page app requires at least one view controller per screen. In our first article, we demonstrated a simple UIViewController, which is limited to presenting another view controller (modally) or invoking another view controller or detail view controller. But there are more suitable view controllers available: with the UINavigationViewController, you can manage the navigation of hierarchical data by pushing (and later popping) a view controller; with the UIPageViewController you can navigate between pages of content. Click here to find Swift-development jobs. To follow along with this lesson, please head over to SourceForge and download the file marked “SecondExample.zip.”
Why Storyboards?
There's nothing stopping you from writing a complex application completely in code. But you could also rely on Interface Builder, a visual designer provided in Xcode that allows a developer to visually design storyboards. This simplifies the process of designing both screens and the connections between screens, as it needs no code and offers an easy-to-read visual map of an app’s navigation.
Making a Scene
When it comes to building apps in Swift, slight differences exist between the iPhone and iPad. On the iPhone, a scene is a full screen’s worth of content; on the iPad, there are multiple scenes onscreen at any one time. You can customize the transitions between scenes with animations. Link enough scenes together, and you have an app. Storyboards facilitate that creation. Let's create a new project in Xcode 6, which you can find in the Mac App Store under “App Development.” It’s free, and you don’t need to be a registered developer to use it, at least not until you want to try out your new app on a physical device.
Upload Your ResumeEmployers want candidates like you. Upload your resume. Show them you're awesome.
To create a new project, click File -> New Project. On the menu, select iOS, then Application, and then click on Single View Application. Click Next and enter a name: 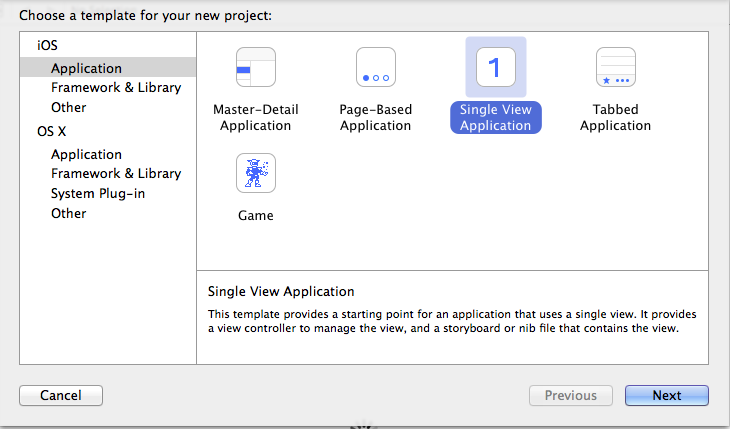 As you’ve doubtlessly noted by this point, I called mine SecondExample. Make sure the language is set to Swift and Devices is set to iPhone. Core Data should be left unticked. Click Next, pick a folder somewhere to save the project, and then click the Create button. Now click SecondExample or whatever you called it, and follow the right arrows until you get to Main.Storyboard (Base). Click it:
 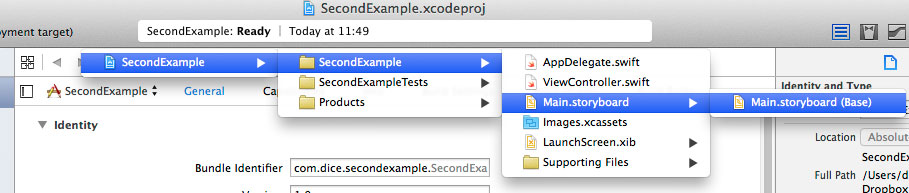 You should now see the View Controller in the storyboard:
 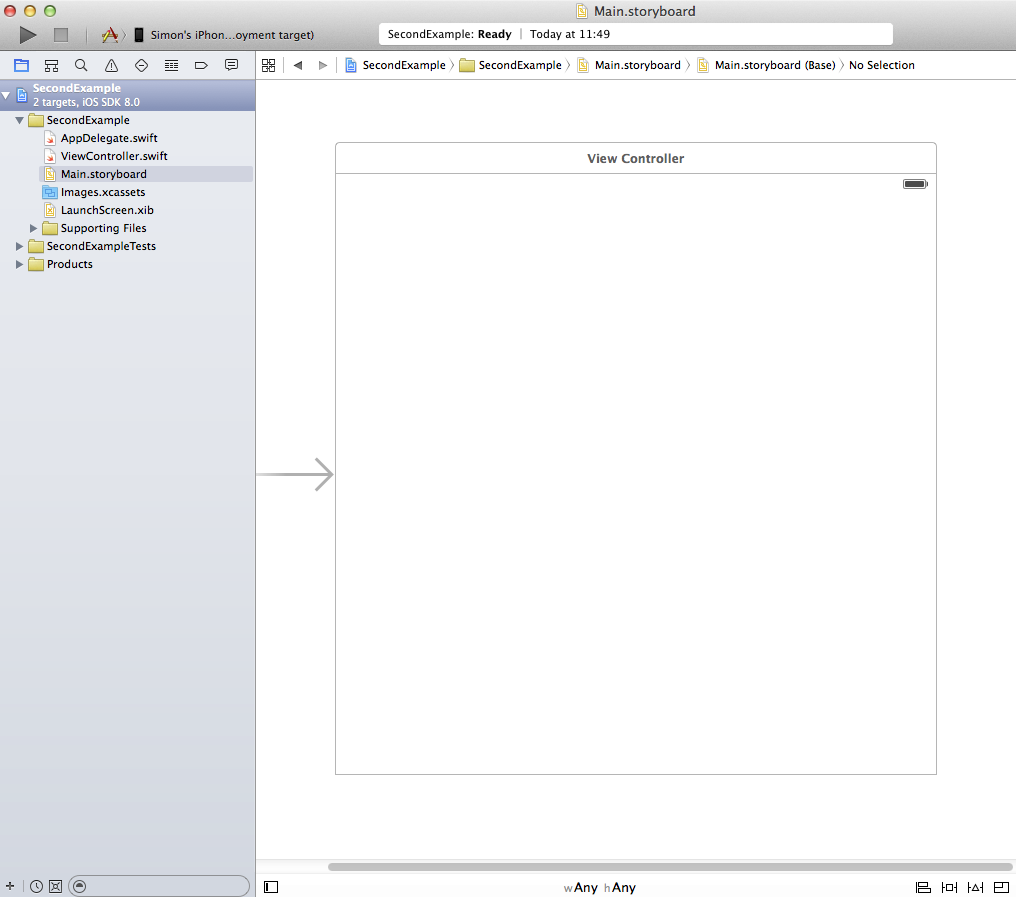 Now find the Object Library. It's at the bottom right of the Utilities window (the rightmost column) and it's handy to see more of it. If you move the cursor down the right hand edge from the top, you'll see the word “Hide” appear to the right of the Identity and Type section:
 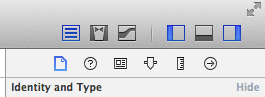 Click “Hide,” move down and do the same for the Interface Builder Document, Localization, Target Membership and Source Control sections. (If you need any of them, just click show.) You'll now have a lot more space for the controls in the object list:
 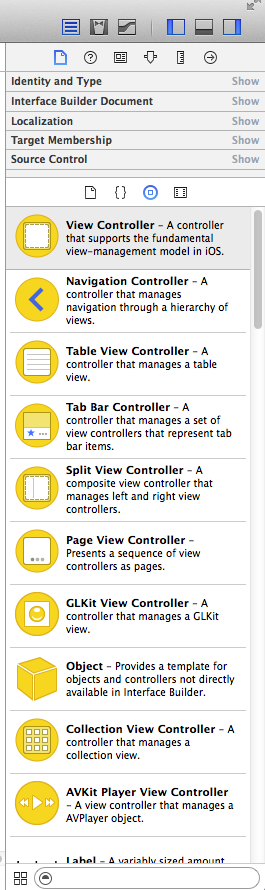 By default, the top of the object list shows the File Template Library, with Cocoa Touch Class being first. Click the two concentric circles above it, and you'll see View Controller and other views and controls. You can slide the panel containing the four icons up; this contains the view controllers and views. Scroll down the list until you find Label, and drop it into the biggest rectangle. Click once to select it, and you'll see eight squares around it that are used to resize the space it occupies. Click a second time, and you'll see what it will look like. Click on the gray around the control to unfocus it:
  And:
And: 
Let's Run It!
For this next part, you need to select a version of the iPhone simulator. In the top right of the main form, you'll see (just below the traffic lights) Play and a Stop buttons, followed by the name of the project, and the currently-selected iOS device or simulator: 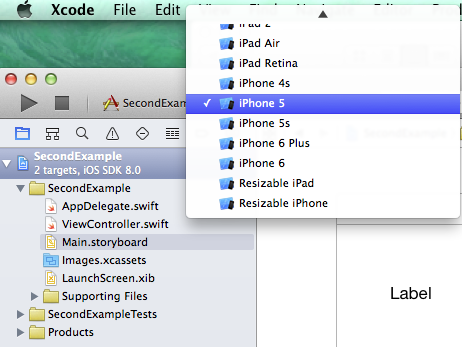 Pick any simulator. From the top menu, select Product, then Clean, followed by Product, then Build For, and then Running. Click Product, Run:
 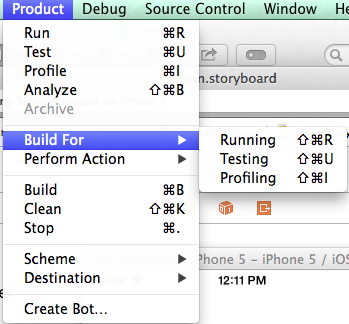 This will open the simulator, revealing a default splash screen as well as the app screen:
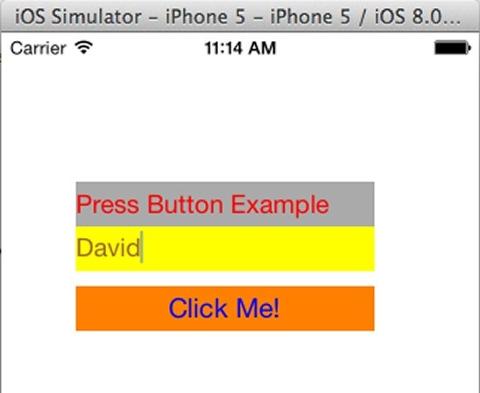
 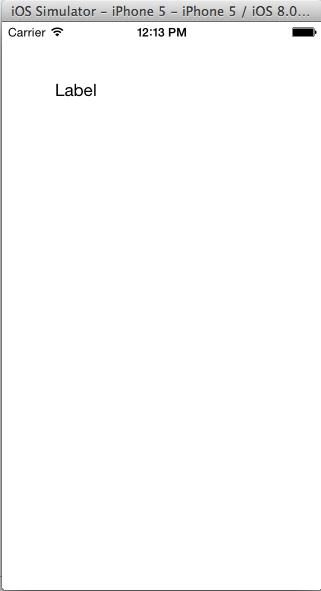 If you want to alter the look of the label, you need to use the Attributes panel. This is the fourth icon atop the Utilities window (a downward-pointing arrow). Whichever control you select will show here, along with the view attributes:
 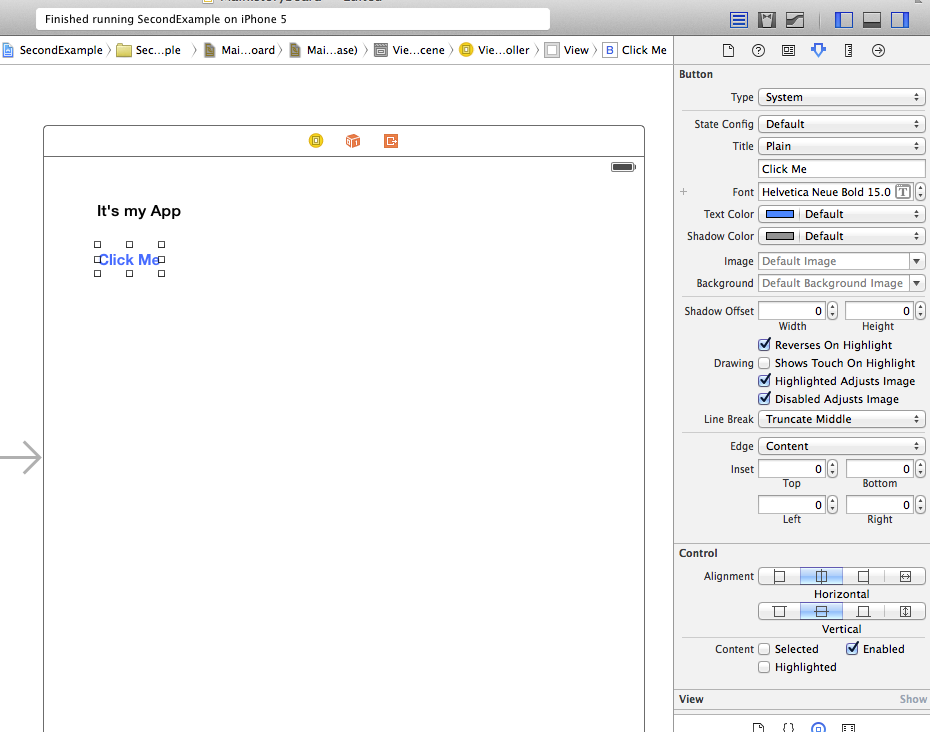 You can hit Cmd + s to save the whole project at any time, Cmd + r to compile and run it, or Cmd + b to just build it. Now add a button to the form; in the Button Inspector (top right of the Utilities window when the button is selected), change the button text to “Click Me.” You'll have to resize the button to see all of the text.
Adding Extra Forms
Let's zoom out until we can see the view controller at 50 percent size; this should leave us some space to add additional elements. Right-clicking on the white space outside the rectangles will generate a popup menu that you can use to select a different size; now drag a second view controller into the white space. We want this controller to appear when the button is clicked. To link the “Click Me” button to the second view controller, hold the Ctrl key down and drag from the button to the view controller. Alternatively, right-click and drag; you'll see a line appear as you drag, and, when the element is over a view controller, that controller will turn blue. Release the key and you'll see a transition menu appear: 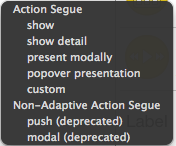 Click on “Present Modally.” You'll now see a link between the two view controllers. It looks like a circle with a square and a >:
  Run the app. When you click the “Click Me” button, you'll see the second form appear over it. Add a label to the second view controller so you can distinguish them. Now we need to dismiss the second form. Let's add a Navigation Bar with a Bar Button. To reduce the number of controls and view controllers visible in the object list, type in “bar” in the search bar at the bottom of the Utilities window; it acts as a filter. Drag a Navigation Bar onto the second form and change Default Position in the Navigation Bar Inspector to Custom Offset, so you can reposition it by dragging. Now drag a Bar Button onto the Navigation Bar and change its text to Cancel. If you run this, you'll now see the Navigation Bar and Cancel button—but clicking it doesn't do anything yet. Right-click on Cancel and drag it to the first form's view controller. Again, you’ll see a line and the view controller will turn blue. Release it and you'll get another menu; select "Popover Presentation." Now when you run it and click Cancel, you'll get a nifty animation and it will return to the first form.
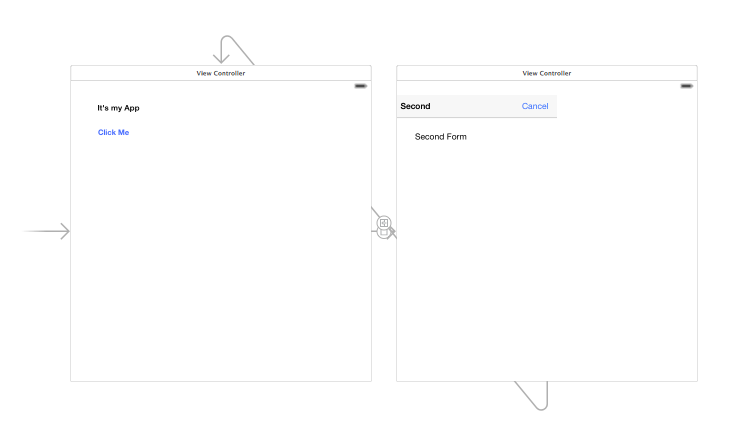
The Complete Storyboard
The first view controller has an arrow pointing to it on the left. This is the root view controller, the first one that ends up being run. You can drag the arrow to any view controller in your app, but the placement only makes sense if it is pointing to the first one. If you open Main.storyboard as source, you'll see that it's an XML file not unlike XAM in Windows Presentation Foundation.
Conclusion
We've just dipped a toe in Swift development and not really touched on the subtleties and nuances of the language, but we'll return to those in future articles. Again, the source and project files from this article are available on SourceForge, in a downloadable folder named “SecondExample.zip.”
Related Articles
Images: David Bolton