
One of the goals of cloud computing is to minimize the number of resources you need. This isn’t just a matter of eliminating any on-premises servers and drives; cloud-based serverless computing is when you create software that runs only as needed on servers dynamically allocated by the cloud provider (also as needed).
On AWS, you can accomplish "serverless" programming using AWS Lambda, a service whereby you upload code in the form of functions that are triggered based on different events that you can configure. One such event is a call coming in through AWS API Gateway, which is the AWS service you use for setting up REST API services. As REST calls come in, the API Gateway can trigger your Lambda code to run. The Lambda code will receive information on the REST call that was made, and your code can respond accordingly.
First, Create the Lambda Function
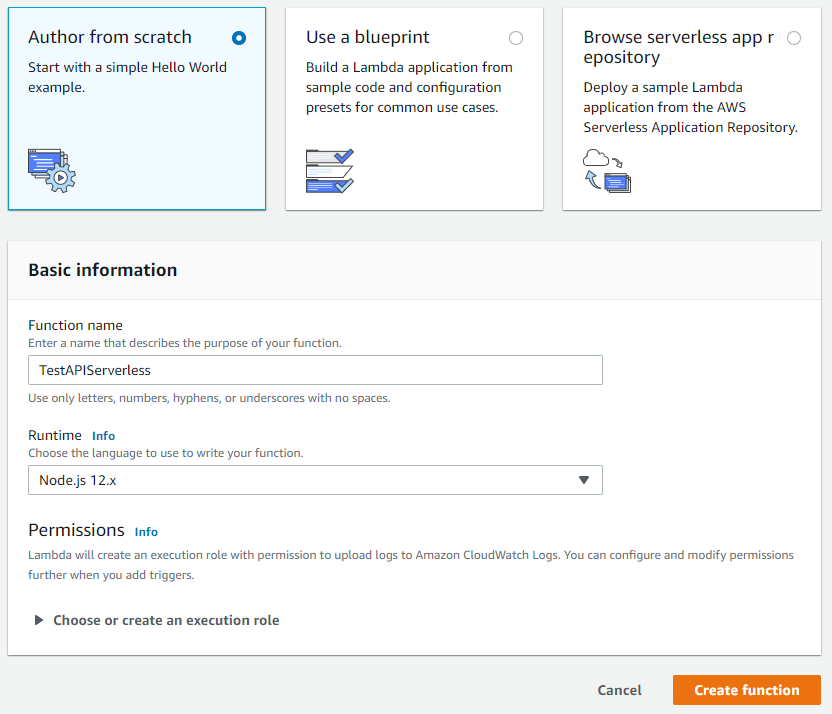
You’ll need to create a new Lambda function; in this example, we’ll use Node.js. Head over to the Lambda console (from the management console, click the Services dropdown and click Lambda), and click the Create Function button; on the next screen, click Author From Scratch and fill in the details, including a name for your function (such as TestAPIServerless) and a version of node.js you want to use (probably the highest version listed).
For this sample, you don’t need to set permissions. By default, the permissions will allow Lambda to upload logs to CloudWatch. Then, click Create Function.
The next screen allows you to enter code into a browser-based IDE and test the code. We’ll just have the code echo back information about the API call itself. In the IDE, replace the starter sample code with this code:
exports.handler = async (event) => {
    var body = {
        path: event.path,
        params: event.queryStringParameters
    }
    const response = {
        statusCode: 200,
        body: JSON.stringify(body),
    };
    return response;
};
Now scroll up and click the orange Save button. That’s all there is to the Lambda function.
Next, Create the API
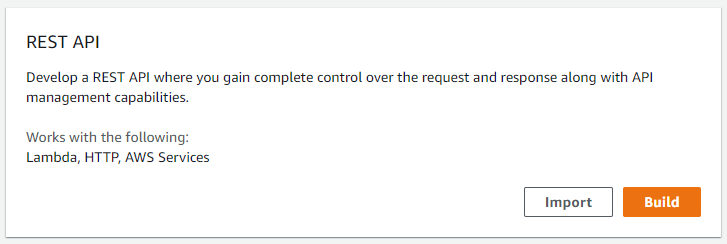
Head over to the API Gateway by clicking the Services dropdown and then API Gateway. In the API Gateway console, scroll down and find REST API, and click Build.
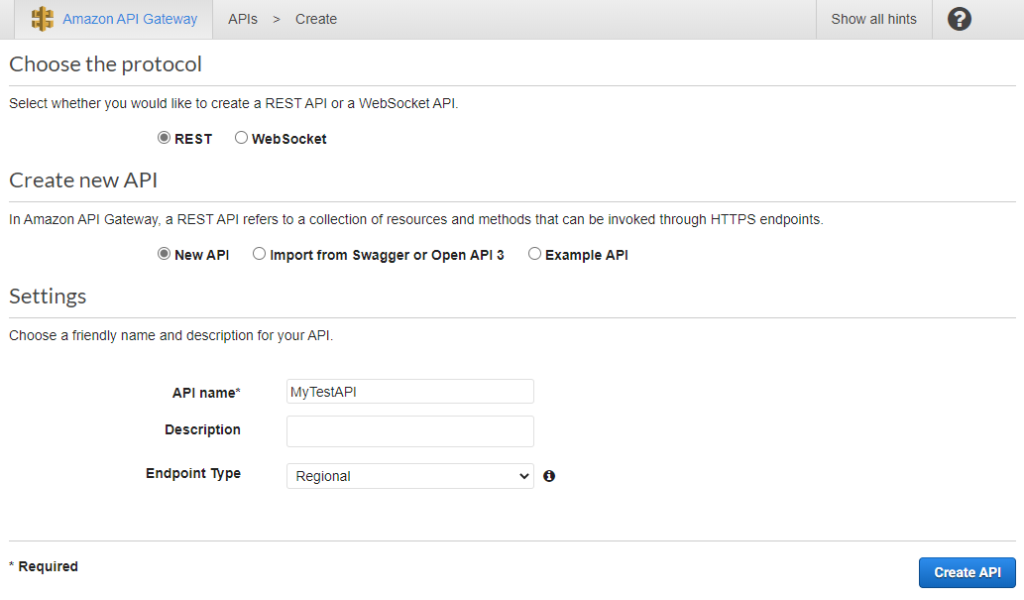
On the next screen, under Choose the Protocol, select REST. Under Create New API, select New API. Under Settings, provide a name such as MyTestAPI. You can fill in Description if you like; for Endpoint Type, choose Regional. Then click Create API.
This creates an empty API. Now you’ll need to add a couple of endpoint methods. We’ll start with the root endpoint, which is the default. Click the Actions dropdown, then click Create Method. In the dropdown below that, click GET so we can respond to incoming HTTP GET requests. Click the grey checkmark.

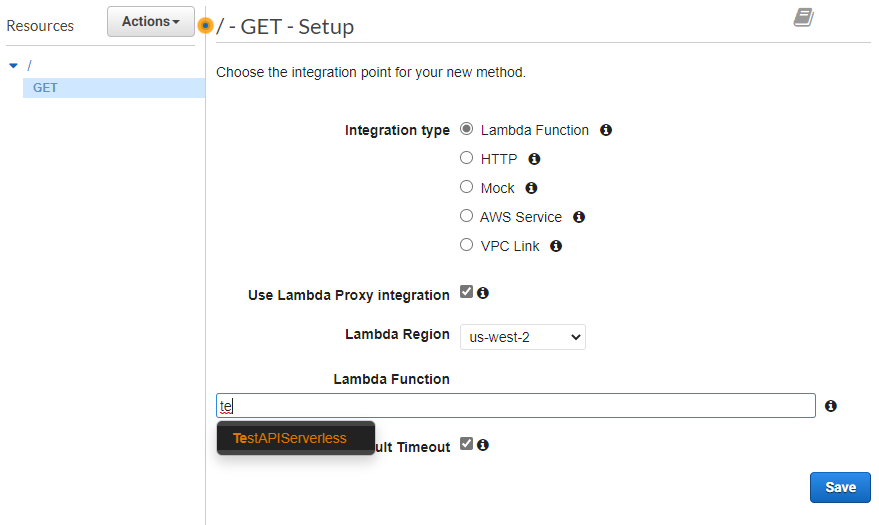
In the next screen, for Integration type, select Lambda Function. Check the Use Lambda Proxy Integration box; this configures the calls with additional data that simplifies the data coming into your Lambda function. In the Lambda Function box, type TestAPIServerless. Then click Save. A message will popup requesting permission for API Gateway to invoke your Lambda function; click OK.
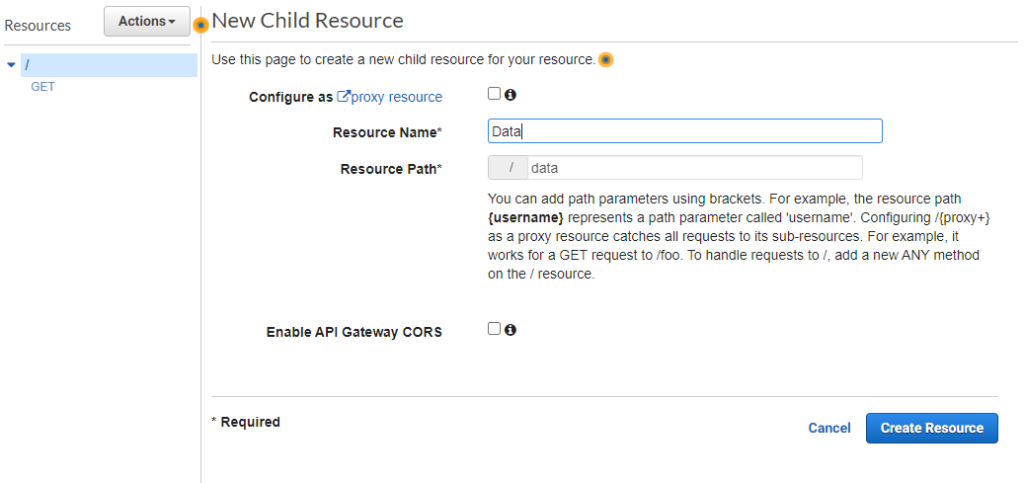
For the next one, we’ll create an API endpoint called /data. Each endpoint is a resource, so in the Actions dropdown, click Create Resource. In the screen that follows, next to Resource Name, type Data. Notice the Resource Path fills in automatically with /data. Now click Create Resource.
Now you have two endpoints; the root with just a slash, and /data. Click /data on the left and follow the same steps as above for adding a Get method. We’re calling the same Lambda function, so all the steps will be the same, starting with clicking Create Method through clicking Save.
Deploy and Test the API
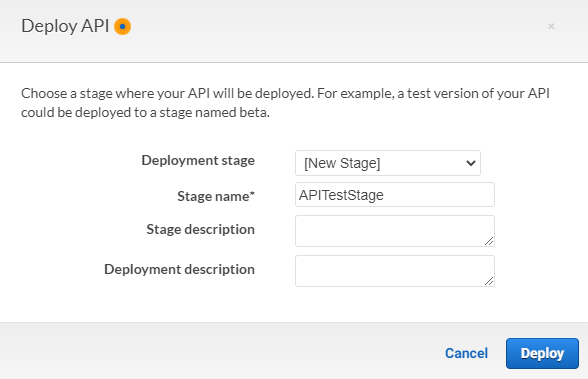
From the Actions dropdown, click Deploy API. In the pop-up window, for Deployment Stage, click New Stage. Under that, call the Stage Name APITestStage. You can leave the other fields blank. Click Deploy.
The API gateway provides various ways of testing, which you can explore in the documentation. But for now you can just call your API method using any tool you like, including curl or the browser itself. The URL you’ll use is displayed right at the top of the screen in a blue box; it will look something like this:
https://qfrwa8l036.execute-api.us-west-2.amazonaws.com/APITestStageRight-click the URL and open in a new browser tab. You’ll see a simple JSON response:
{"path":"/","params":null}Now add /data?abc=10&def=20 to the end of the URL to invoke the /data endpoint with a couple of query parameters. Press Enter and you’ll see information about the path and parameters:
{"path":"/data","params":{"abc":"10","def":"20"}}That’s it! You now have a serverless API that responds to two different endpoints.
Where to Go Next
In developing your API, you’ll likely want to use your own domain rather than long, default URLs. You can read about it in the official docs.
Also, if you’re determined to remain serverless, you can make use of managed database services to provide the database backend to your software; here’s sample code for accessing AWS RDS. As you bring the pieces together, you’ll see that you have a complete REST API fully hosted on AWS, but without the trouble of allocating any servers. (And as you develop your AWS-related knowledge, if you’re interested in machine learning via Amazon’s cloud, check out how to get started with SageMaker and more.)
