Processing is a programming language that was developed at MIT so artists and other creatives could learn to program in a visual context. It's built on top of Java and has a basic IDE for editing and running “sketches.” The sketches -- otherwise known as code -- are gathered in a “sketchbook.” This metaphorically helps the artists to organize their coding workflow into something they recognize. The latest version is 2.0.3, also known as “Processing2.”  No matter who it’s designed for, don't sell Processing short. It has some interesting features that you’ll probably want to explore. A knowledgeable community has been built up around the language, and there’s a lot of good documentation to support new developers and designers. Upwards of 100 libraries have been created to expand core functions, and it's sufficiently robust to handle video manipulation and 2-D/3-D animation.
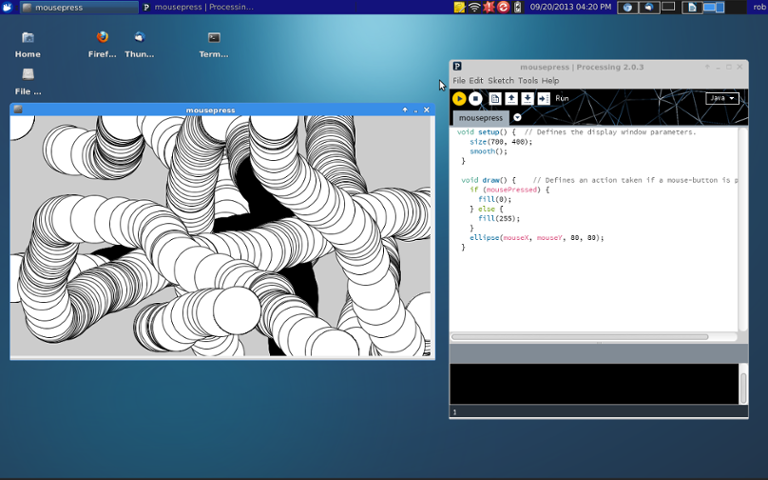
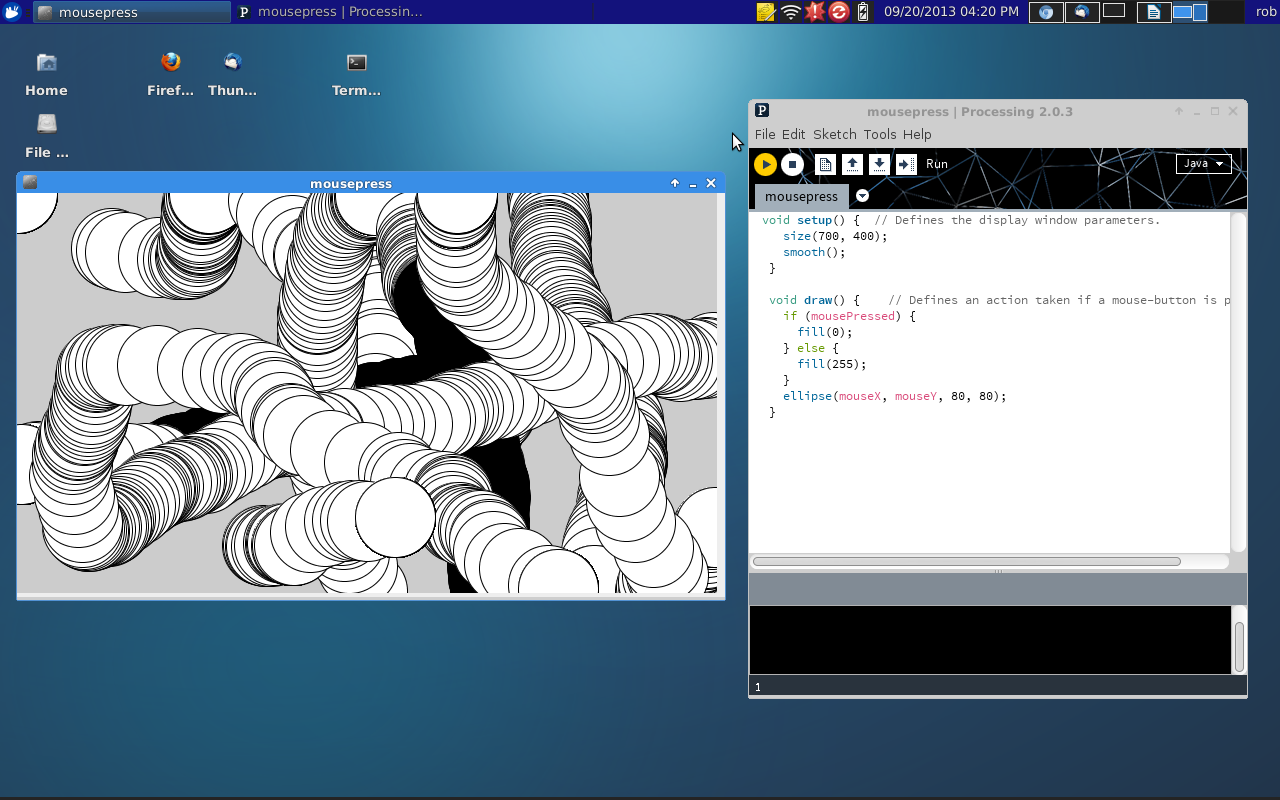
 Looks a lot like Arduino code, doesn't it? In this case the application just draws a new ellipse as the mouse is moved around. The color of the ellipse changes to black whenever the left mouse button is pushed. The processing package contains all manner of examples that can be used and edited to suit your needs. Once code is modified, you just push the yellow left-arrow button that’s located just below the File menu to run the program. To stop execution, hit the little button with the square that’s next to the yellow arrow. Errors show up down in the black program logging area (serial output) at the bottom of the window. The biggest challenge I've found is finding the right libraries for the task at hand. Also, some libraries might have spotty support, but that’s the nature of open source. Users are certainly welcomed to extend and share their own libraries with the community. While a lot of mainstream developers may not know much about Processing, it's a language that you might want to check out. The environment lends itself to rapid prototyping of ideas and shields users from many of the tedious elements of other languages, like memory management. Artists and makers are using it for a variety of projects, particularly incorporating the Arduino and cross-platform applications.
 No matter who it’s designed for, don't sell Processing short. It has some interesting features that you’ll probably want to explore. A knowledgeable community has been built up around the language, and there’s a lot of good documentation to support new developers and designers. Upwards of 100 libraries have been created to expand core functions, and it's sufficiently robust to handle video manipulation and 2-D/3-D animation.
The Look and Feel
The look and feel of the standard Processing IDE should be familiar to anyone who's ever uploaded code to an Arduino. That's right, the Arduino IDE is a window into Processing, with a serial monitor and a few other features added in. Both developer environments run on Windows, Linux and Mac OS X. So if you’re familiar with the Arduino, you’ve had some exposure to the syntax and flow of a Processing program. What's more, Processing offers a consistent way to code programs that run on your Windows, Linux or Mac notebook as well as the Arduino family of microcontrollers. Why not use the same language on all platforms? Of course, the Arduino reads inputs, does some calculations and sets outputs. Data can also be sent back and forth over the serial line. It's an easy jump to visualize that shapes, text and animation on a PC or Mac can then be displayed that actually interact with the data from the Arduino. A simple example might be a digital thermometer hooked up to the Arduino that sends readings to a digital dashboard on the PC desktop. Or, you might have a desktop button that turns on LEDs hooked up to the Arduino. With the proper libraries, laptop Processing programs can be transferred down and installed on an Android device. There are also Bluetooth and networking libraries in various stages of development. In addition, Processing has been extended onto the Web through a JavaScript wrapper. The project is called Processing.js. Selected functions can run as part of a Web application, through its own little Web server.Notebook Functionality
Using Processing on a notebook is pretty straightforward. First, create a working directory. For example, on a Linux machine, I created “processing2” under the /home/rob directory. Next, I downloaded the latest version of the IDE from processing.org to the working directory and unzipped the contents. It put everything under a new processing-2.0.3 directory. I just moved everything back up to my processing2 working directory. Then it's just a matter of running the main program from the command line:rob% ./processing
The IDE will start and it's good to go. The graphic below shows the IDE window on the right with the running program window on the left. The code shown is one of the simple demo programs found under the File/Examples menu item. Looks a lot like Arduino code, doesn't it? In this case the application just draws a new ellipse as the mouse is moved around. The color of the ellipse changes to black whenever the left mouse button is pushed. The processing package contains all manner of examples that can be used and edited to suit your needs. Once code is modified, you just push the yellow left-arrow button that’s located just below the File menu to run the program. To stop execution, hit the little button with the square that’s next to the yellow arrow. Errors show up down in the black program logging area (serial output) at the bottom of the window. The biggest challenge I've found is finding the right libraries for the task at hand. Also, some libraries might have spotty support, but that’s the nature of open source. Users are certainly welcomed to extend and share their own libraries with the community. While a lot of mainstream developers may not know much about Processing, it's a language that you might want to check out. The environment lends itself to rapid prototyping of ideas and shields users from many of the tedious elements of other languages, like memory management. Artists and makers are using it for a variety of projects, particularly incorporating the Arduino and cross-platform applications.

